Category Archives: Software Development

Posts about software development. Generally I use Java, PHP, and Python for development but occasionally I delve into other things as well.

PSA: Prefer to use AdoptOpenJDK’s jdk-11 builds for embedding in Mac Apps

If you are planning to distribute a Java app on Mac, you should avoid using the JDK builds from jdk.java.net as they won’t necessarily work on Mac OS older than 10.13. This is because the libjvm.dylib is build with MACOSX_MIN_VERSION set to 10.13. This doesn’t necessarily cause a problem until you try to run a signed app on Yosemite or older (10.10). Your app just won’t open. Checking the logs you’ll receive an error like:

​Error: dl failure on line 542
Error: failed /Applications/MyApplication.app/Contents/Java/jre//lib/server/libjvm.dylib, because dlopen(/Applications/MyApplication.app/Contents/Java/jre//lib/server/libjvm.dylib, 10): no suitable image found.  Did find:
    /Applications/MyApplication.app/Contents/Java/jre//lib/server/libjvm.dylib: code signature invalid for '/Applications/MyApplication.app/Contents/Java/jre//lib/server/libjvm.dylib'

Now, you might be fine if you’re building the app on 10.10 or older, but not sure. This particular issue is a combination of:

  1. libjvm.dylib set with a min version of 10.13.
  2. codesign on 10.11 and higher automatically signs libs targeting 10.11 and higher with a different signature than is can be understood by gatekeeper pre 10.11.
  3. Gatekeeper barfing when it hits this signature.

So, If you’re building (signing) your app on the latest Mac OS and you want to be able to distribute it to older versions of OS X, you need to make sure that all of your libraries are built with the MACOSX_MIN_VERSION set to 10.10 or lower.

You can verify this using otool. Inside the standard openjdk build on jdk.net, you can go into the Contents/Home/lib directory, and run:

$ otool -l  */libjvm.dylib | grep VERSION -A 5 | grep version
  version 10.13
  version 0.0

(Note: libjvm.dylib is the only problematic one. All the other dylibs are built with 10.8 min version).

However, if you download the build from AdoptOpenJDK, and do the same thing, you’ll find

$ otool -l  */libjvm.dylib | grep VERSION -A 5 | grep version
  version 10.8
  version 0.0

Just another reason to use AdoptOpenJDK for your Java distro.

High Sierra, Ruby, RVM, CocoaPods, ipatool, xcodebuild Ughh!!

This is a very terse post to record a problem/solution for Cocoapods on High Sierra.

I have a build process that involves running cocoapods and xcodebuild on the command line. Some time ago, I installed rvm in an attempt to fix a build error. It ended up not fixing the error, but I kept it installed because it seemed like a nice thing to be able to easily switch between ruby versions. However, xcodebuild and its sub-tools are picky about using the system ruby, so before running xcodebuild, I would always have to switch back to the system ruby using rvm use system. This was an inconvenience, but it wasn’t hard to do, so I just endured.

Some time later, I upgraded to High Sierra, which broke my system ruby. Running ruby would give an error like

dyld: Library not loaded: /System/Library/Frameworks/Ruby.framework/Versions/2.0/usr/lib/libruby.2.0.0.dylib
  Referenced from: /usr/local/bin/ruby
  Reason: image not found
Abort trap: 6

This seems to be because High Sierra upgraded its ruby to 2.3.0, but rvm some things still referenced the old 2.0 installation, which had been removed. In trying to resolve this situation I first uninstalled rvm – because I didn’t seem to be helping anything and could possibly be hurting things:

rvm implode

After doing this, I still received the error message above. I then noticed that I had two ruby binaries on my Path: /usr/local/bin/ruby and /usr/bin/ruby. The former referenced the old 2.0 libs, while the latter seemed to correctly reference the new location. So, I deleted the former:

sudo rm /usr/local/bin/ruby

And things almost started working. When I tried installing cocoapods again with:

sudo gem install cocoapods

I received “Permission denied” messages. I needed to do

sudo gem install -n /usr/local/bin cocoapods

And, voila!, things magically start working again.

Use NPM to Distribute Your Command-Line Java Apps

jDeploy flow

From time to time, I need to develop and distribute a command-line application to my customers, and I prefer to write these apps in Java. But I’ve been frustrated by the Java eco-system’s lack of good distribution options for this type of app. I look at tools like Cordova and Ionic that provide a neat “single-line” installation instructions and wonder why I can’t achieve the same thing with Java.

My general solution up until now has been to zip up the executable Jar with its dependencies, and post it for my users to download. The installation instructions then become something like:

  1. Download myapp.zip
  2. Extract it
  3. Then run the app using something like “java -jar /path/to/myapp/myapp.jar”

Sometimes I go as far as writing shell script launch scripts that people can add to their PATH, but this adds an additional installation step…. we were already at 3 possible places for users to get stuck.

Compare this to the installation instructions for Cordova:

  1. Open a command prompt and type “npm install -g cordova”. No need to download anything manually. Just one command
  2. Once installed, you can just run “cordova”, you don’t need to know where it was installed. A symlink is automatically installed in your environment PATH.

That is the type of user experience I want for my command-line apps. Java offers some great package management options for distributing libraries (e.g. Maven and Gradle), but these don’t offer a simple way to distribute applications. Wouldn’t it be nice if we had a way to distribute command-line apps the same way?

NPM to the Rescue

The examples I provided above (Cordova and Ionic) both use NPM as their distribution mechanism. That is what allows them to provide such a smooth process. If you’re not familiar with NPM, it is the package manager that is bundled with NodeJS. Unlike Maven, which is constrained to use in the Java ecosystem (you can only distribute .war, .jar, and pom files), NPM allows you to distribute all manner of files, so why not use it to distribute Java apps. Sounds crazy, I know. But let’s look at some of the features of NPM that make it ideal for distributing Java applications:

  1. WORA – NPM is cross platform, and is automatically installed when users install NodeJS on their system. NodeJS provides a simple double-clickable installer for Mac, Windows, and Linux, so your application can easily be installed on all major platforms.
  2. Pain-free Publishing – Publishing an app to NPM is as simple as npm publish. If you don’t yet have an account on NPM, it’s as simple as npm login. Literally could take you under a minute to get set up and rolling.
  3. Adds to PATH – NPM will automatically add symlinks for your application to the environment path when installed globally. On windows it automatically generates a .cmd script to launch the app. That is the magic that allows apps like Cordova to provide single-line installation instructions.

In addition to all this, NPM provides automatic versioning and updates so that it is easy for you to push updates out to your users. This is a big deal.

But How Do I Deploy my Java App using NPM

You say: This is all fine and well, but how do I leverage NPM to deliver my Java application. NPM is designed to distribute apps written in Javascript, not Java.

I respond: Let me introduce you to jDeploy

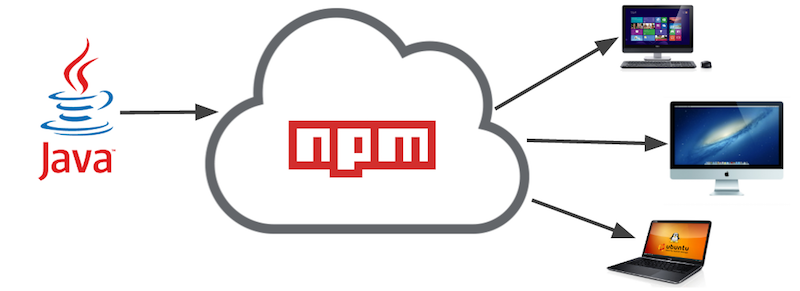
jDeploy is a tool that allows you to publish your Java applications on NPM so that users can install it directly using a simple command like

npm install -g your-app

It will take an executable Jar file and bundle it in a node module with all of its dependencies, and publish it to NPM. The resulting app doesn’t even require that the users have Java installed, as it will automatically install a JRE if it detects that Java isn’t installed.

Example

Installing jDeploy

$ npm install -g jdeploy

Publishing an App to NPM

Suppose you have an app in an executable jar file, “myapp.jar”. Place this in a directory on its own, and open a command prompt in this directory, and type:

jdeploy init

This will generate a package.json file for your app that is ready and configured to publish on NPM. You may want to edit this package.json slightly to suit your purposes. The default will look something like:

{
  "bin": {"myapp": "jdeploy-bundle/jdeploy.js"},
  "preferGlobal": true,
  "version": "1.0.1",
  "jdeploy": {"jar": "myapp.jar"},
  "dependencies": {"shelljs": "^0.7.5"},
  "license": "ISC",
  "name": "myapp",
  "files": ["jdeploy-bundle"] 
}

The “myapp” key in the “bin” property is the command name for your app. This is the name of the command that users will run on the command-line to use your app. Change this to something else if you want the command to be different.

The “name” property should be globally unique. This is the identifier that will be used to install your app from NPM. E.g. npm install -g myapp. You may need to change this if the name is already taken by someone else.

Once you’re happy with the settings, you can test out the app locally to make sure it runs.

$ jdeploy install

This should install your command locally so you can try it out:

$ myapp

And your app should run.

Once you’re satisfied that your app works the way you like, you can run

$ jdeploy publish

Installing Your App

Now that your app is published, people can immediately install your app from anywhere in the world, on any computer that runs NPM with a single command:

$ npm install -g myapp

NOTE: On Mac/Linux you will need to use sudo to install the app. Windows should work as long as you are using an administrator account.

Screencast

Introduction to jDeploy Screencast

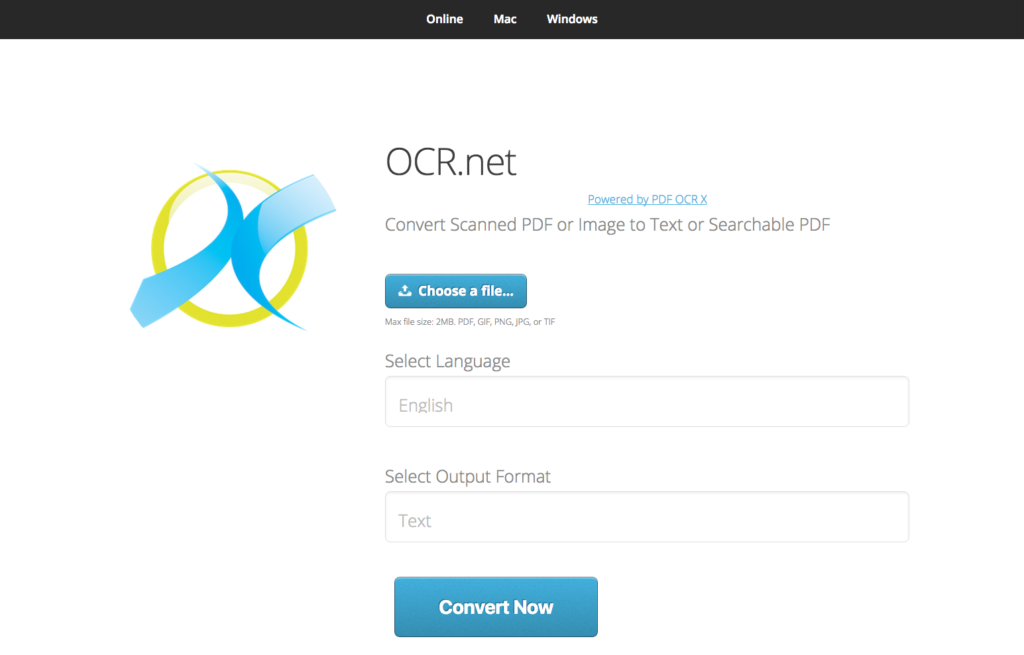
OCR.net is officially launched

I’m on “vacation” right now from my job at Codename One, so I’m taking some time to work on personal projects for the first time in a while. On the second day of my “personal project” time, I received an email offering me the domain name OCR.net. I was interested in this domain for SEO purposes of PDF OCR X, an app I developed for Mac and Windows for converting scanned PDFs and images into text or searchable PDFs using OCR. Though it cost me a small fortune, I decided to buy the domain.

Now, I could have just redirected this domain to the PDF OCR X website, but I thought it might be cool to create an online version so that OCR.net could function as a self-contained OCR web app. Converting PDF OCR X into a web app took a bit of work. In addition to setting up a public-facing web site, I needed to modify the app so that it would run as a daemon, rather than a “drag-and-drop” desktop app. I built a job dispatching system using Xataface which runs on the OCR.net server itself. The PDF OCR X “daemon” is then run on a Mac server, elsewhere (currently in my basement), but the architecture is such that I can fire up as many “PDF OCR X” boxes as I like and they will request jobs from the central dispatcher as they become available. This way it is easy to scale the service.

Responsive UI

I wanted a clean, modern user interface for the web app. And it needed to look good on mobile as well as desktop. I found this nice design by ajlkn that felt right. It is minimal and clean.

Here is the UI on the desktop:

OCR.net desktop screenshot
]7 OCR.net desktop screenshot

And here is what it looks like on mobile:

OCR.net as seen on a mobile device
]8 OCR.net as seen on a mobile device

As a Mobile Application

PDF OCR X has always only been a desktop application (Mac or Windows). I hadn’t paid much attention to mobile. However, with this new web-based UI, it is actually quite useful as a mobile app in itself. On my iPhone I tested it out by taking some snapshots of some documents on my desk, and it converted them with pretty good accuracy. Adding OCR.net to my home screen allows me to use it just like a first class iOS application.

Try it out

Try it out. Share it with your friends. Add it to your phone’s home screen. Use it.

And let me know what you think.

Async to Better U/X

I come to you today with three simple tips that will guarantee to improve your Codename One apps’ usability:

  1. Don’t block the EDT
  2. If you must block the EDT, do it when the user won’t notice
  3. Prefer asynchronous coding patterns (e.g. using callbacks) to synchronous coding patterns (e.g. *AndWait(), and *AndBlock() methods).

The first one is GUI 101. All of the UI is drawn on the EDT (Event dispatch thread). If you are performing a slow operation on the EDT, the user will probably notice a lag or a jerk in the UI because drawing can’t take place while your slow operation is occupying the thread.

Here’s a quick example. I have a form that allows the user to swipe through 12 images, which are loaded from the classpath (getResourceAsStream()). My first attempt at this is to load all of the images into Labels inside the Form’s constructor as follows:

public class MyForm extends Form {
    private Tabs tabs;

    public MyForm() {
        super("Welcome to My App");

        tabs = new Tabs();

        tabs.hideTabs();

        setScrollable(false);
        Container buttonsContentWrapper = new Container(new BorderLayout());
        try {
            for (int i=1; i< =12; i++) {
                int w = calculateTheWidth();
                int h = calculateTheHeight();
                Button l = new Button(
                        Image.createImage(
                                Display.getInstance().getResourceAsStream(null, "/Instructions"+fi+".png")
                        ).scaledSmallerRatio(w, h)
                );

                l.setUIID("Label");
                if (i>1) {
                    l.setUIID("InstructionImage");
                }
                l.addActionListener(e->{
                    buttonsContentWrapper.setVisible(!buttonsContentWrapper.isVisible());
                    revalidate();
                });
                Container tabWrapper = FlowLayout.encloseCenter(l);
                tabWrapper.getAllStyles().setPaddingTop(Display.getInstance().convertToPixels(2));
                if (i==12) {
                    tabWrapper.putClientProperty("lastSlide", Boolean.TRUE);
                } else {
                    tabWrapper.putClientProperty("lastSlide", Boolean.FALSE);
                }
                tabs.addTab(i+"", tabWrapper);
            }
        } catch (Exception ex) {
            Log.e(ex);
        }
        Container mainContent = new Container(new BorderLayout());
        mainContent.addComponent(BorderLayout.CENTER, tabs);
        setLayout(new LayeredLayout());
        addComponent(mainContent);

        buttonsContentWrapper.setVisible(false);
        Button skipButton = new Button("Skip");

        skipButton.addActionListener(e->{
            MyApp.getInstance().getMainForm().show();
        });

        Container buttonsContent = FlowLayout.encloseRight(skipButton);
        buttonsContentWrapper.addComponent(BorderLayout.SOUTH, buttonsContent);
        addComponent(buttonsContentWrapper);
    }
}

So what’s the problem with this code? Loading the 12 images inside the constructor of this form takes too long. If I have code like:

MyForm form = new MyForm();
form.show();

There is a lag of 1 or 2 seconds in the new MyForm() line — before the form is even shown. This feels really bad to the user.

We can improve on this by employing the 2nd tip above:

If you must block the EDT (hey we need to load the images sometime right?), then do it when the user won’t notice

Rather than loading all of the images directly inside the MyForm constructor, we can load each one inside its own Display.callSerially() dispatch, as shown below:

public class MyForm extends Form {
    private Tabs tabs;

    public MyForm() {
        //...
        try {
            for (int i=1; i< =12; i++) {
                //...
                final Button l = new Button();
                Display.getInstance().callSerially(()->{
                    try {
                        l.setIcon(
                            Image.createImage(
                                    Display.getInstance().getResourceAsStream(null, "/Instructions"+fi+".png")
                            ).scaledSmallerRatio(fw, fh)
                        );
                        l.getParent().revalidate();
                     } catch (Exception ex){
                        Log.e(ex);
                    }
                });
                //...

            }
        } catch (Exception ex) {
            Log.e(ex);
        }
        //...

    }
}

This will still load the images on the EDT, but it will do them one by one, and in a future event dispatch, so that the code won’t block at all in the constructor. If you run this code, you’ll notice that the 1 to 2 second lag before showing the form is gone. However, the form transition may contain a few “jerks” because it is still interleaving the loading of the images while drawing frames.

So this is an improvement, but still not a good user experience. Luckily we can go back to tip #1, “Don’t block the EDT”, when we realize that we didn’t have to block the EDT at all. We can load the images on a background thread, and then apply them as icons to the labels when they are finished loading, as shown below:

public class MyForm extends Form {
    private Tabs tabs;

    public MyForm() {
        // ...
        try {
            for (int i=1; i< =12; i++) {
                // ...
                final Button l = new Button();
                Display.getInstance().scheduleBackgroundTask(()->{
                    try {
                        Image im = Image.createImage(
                                Display.getInstance().getResourceAsStream(null, "/Instructions"+fi+".png")
                        ).scaledSmallerRatio(fw, fh);
                        if (im != null) {
                            Display.getInstance().callSerially(()->{
                                l.setIcon(im);

                                l.getParent().revalidate();
                            });
                        }
                    } catch (Exception ex){
                        Log.e(ex);
                    }
                });
                //...
            }
        } catch (Exception ex) {
            Log.e(ex);
        }
        //...

    }
}

This has double nesting. The first nest (inside scheduleBackgroundTask()) downloads the icon on a background thread. Then the second nesting using callSerially(), assigns the image as the label’s icon back on the EDT. This was necessary because we can’t access the label from the background thread. That part must occur on the EDT. But that part is non-intensive and very fast to perform.

So the result is a very fluid user experience with no lags and no jerks.

Prefer Async to Sync

I’ll address the preference of Async to Sync separately. The example above is a sort of example of this since the nested calls to scheduleBackgroundTask() and callSerially() are technically “callbacks”. However, with this tip I’m more specifically targeting methods like invokeAndBlock(), addToQueueAndWait(), and other *AndWait() methods. At their core, all of these methods are built upon invokeAndBlock() so I’ll target that one specifically here – and the wisdom gleaned will also apply to all AndWait() methods.

First of all, if you aren’t familiar with invokeAndBlock, it is a marvelous invention that allows you to “block” the EDT without actually blocking the EDT. It will indeed block the current dispatch event, but while it is blocked, it will start processing the rest of the events in the EDT queue. That way your app won’t lock up while your code is blocked. This strategy is used for modal dialogs to great effect. You can effectively show a dialog, and the “next” line of code isn’t executed until the user closes the dialog – but the UI itself doesn’t lock up.

invokeAndBlock() is the infrastructure that allows you to do synchronous network requests on the EDT (e.g. NetworkManager.getInstance().addToQueueAndWait(conn)). Since this pattern is so convenient (it allows you to think serially about your workflow – which is much easier), it is used in all kinds of places where it really shouldn’t be.

So why NOT use invokeAndBlock

Because it will ALMOST always result in a worse user experience. I’ll illustrate that with a scenario that would seem, at first, to be a good case for invokeAndBlock (addToQueueAndWait()).

Here is a form that allows a user to update his bio. Somehow the form needs to be populated with the user’s existing profile data, which is exists on a network server. The question is when and how do we load this data from the server.

A first attempt might populate the data inside the form’s constructor using AddToQueueAndWait() (or some method that encapsulates this). That might look like this:

public class MyForm extends Form {

    public MyForm() {
         ConnectionRequest req = createConnectionRequest();
         NetworkManager.getInstance().addToQueueAndWait(req);
         setupFormComponents();
         populateFormData();
    }
}

The problem with this is similar to our first example loading images from the classpath. Execution will stall inside the constructor for our form while the data is loaded. So the user will have to wait to show the form. A common technique to mitigate this UX blunder is to display an infinite progress indicator so the user knows that something is happening. That’s better, but it still makes the app feel slow.

If we want the user to be able to see the form immediately, then either we need to have loaded the data before-hand, or we need to show the form, and populate it later. We could also use a combination (e.g. show the form with data we loaded before, then update it once we have the new data.

Loading data before hand, exclusively, is not realistic. There must exist a point after which we deem the data is too old and we need to reload it. And we are back at needing to load data when the form loads.

If we want to solve this problem, and still use addToQueueAndWait(), we either need to wrap addToQueueAndWait() inside a callSerially() dispatch so that it doesn’t block inside the constructor – and delay our show() method; or we need to move the call somewhere else, after the form is already shown. Although that isn’t ideal either, because we’d like to have the data as soon as possible – so the longer we delay the “sending” of the network request, the longer the user has to wait for the result.

Now, our handy tool (invokeAndBlock) that was supposed to reduce our app’s complexity, is actually making it more complex. Wrapping it inside callSerially() in the constructor means that we are now combining an async callback with sync blocking code. We might as well, at that point, just use addToQueue(), and use a result listener to process the response without blocking the EDT at all, as shown in the example below:

public class MyForm extends Form {

    public MyForm() {
         ConnectionRequest req = createConnectionRequest();
         req.addResponseListener(e->{
             populateFormDataWithResponse(req);
         });
         NetworkManager.getInstance().addToQueue(req);
         setupFormComponents();
    }
}

This predicament is the reason not to use invokeAndBlock (addtoQueueAndWait()). It isn’t that they are evil, or they can’t be made to work. It is because, if you aim to achieve an optimal user experience, it will get in the way more than it will help.

Does this mean that you should never use invokeAndBlock() or addToQueueAndWait()? No. There are valid cases for both of these. E.g. addToQueueAndWait() can be used from a background thread (off the EDT), in which case it isn’t even using invokeAndBlock. It is just plain-old blocking that background thread, which is perfectly OK because it’s not the EDT. In addition, there may be cases where you DO want to block the flow of the application without locking up the UI. Modal dialogs is the flag-ship use-case for this. I struggle to think of another suitable scenario though.
Entitled OSS Users and the Xamarin RoboVM acquisition

RoboVM has been acquired by Xamarin, it was announced; and it would no longer be open source.

Wow.

It only took five minutes for the forum posts and reddit threads to start up condemning the move as some sort of robbery. The RoboVM was accused of luring unsuspecting users into its community on the promise of open source, only to pull a switcheroo and sell out to big business. Some users were demanding the RoboVM team continue to share their work for free, because … that would only be fair.

RoboVM, on the other hand, explained that they had been open source for a few years and had received little to no contributions from the community, so there wasn’t much incentive to continue with that approach. My personal experience with managing open source projects is consistent with theirs. I released the first version of Xataface in 2005. In that time it has hundreds of thousands of downloads, and is still used in many enterprises as the back-bone of their web information systems (I don’t have an exact count since most apps built with Xataface are internal). In that time, I can count the number of community contributions on my fingers and toes. I’m thankful to all of the users who did contribute. But let’s be real, the case for open sourcing a project because the community will contribute is not compelling.

Shut up and Fork it!

No, really. The source (albeit a couple of months out of date) is still on GitHub and it is licensed under the GPL. That repository represents countless hours of high-quality work by incredibly skilled individuals. That is one hell of a contribution to the open source community. Let them move on; And if you want your open source RoboVM, you can build on this fantastic source base.

Personally, I think it is highly likely that the last open source version of RoboVM will continue to circulate for a long time to come. At least in its core as an AOT java VM, it should be maintainable by people on the outside because most of the heavy lifting is already done there. It is the value-added components like the iOS API bindings, and tool support, that will be difficult for the community to maintain going forward. These things are evolving too fast for volunteers to keep up with.

Dependent Tools

If you are an iOS developer who just uses RoboVM to build iOS apps in Java, then the move to close the source probably won’t affect you – except that your costs may be going up some. I wonder more about the impact that this has on other developer tools that have made RoboVM an integral part of their tool chain. I’m thinking about companies like Gluon that provides JavaFX support for iOS and Android. They use RoboVM for their iOS builds. DukeScript, which allows you to write Java apps with an HTML5 UI and deploy to iOS (and other platforms), also uses RoboVM for its iOS builds. How will they respond.

I had argued as recently as 6 months ago that we (at Codename One) should incorporate RoboVM into our toolchain rather than maintain our own Java VM. But we ultimately decided that there was too much risk in that approach because “what if RoboVM closes down, or goes closed source”. 20/20 hindsight shows that we made the right choice and our new iOS VM is now quite mature, performant, and robust. But most importantly we are not dependent upon other external factors for maintaining it.

What Open Source VMs are Left for iOS?

RoboVM wasn’t the only open source VM for iOS. It was just the most active, and provided the best and most comprehensive bindings to the iOS native APIs. But there are alternative VMs that the open source community may turn to for their supply chain. For example:

  1. Codename One (proper) – (Full disclosure, I work for Codename One)… Codename One is open source and provides a full cross-platform Java solution for write once run anywhere.
  2. Codename One’s VM – Codename One has developed its own Java VM for iOS that works as a cross-compiler from Java to C. This is open source and is a good option for Java tools that need a path to iOS.
  3. Avian – Avian is an AOT Java compiler that can be used to compile java directly to iOS binaries. It is written in C++, and has a very permissive license.
  4. XMLVM. This project has been discontinued. But I mention it for completeness in case people want to revive it.
  5. OpenJDK for iOS. It has been approved for an iOS port of the Open JDK to be developed. This may also present a long-term option, but this is still only in the planning stage.
  6. J2ObjC – A transpiler that converts Java source code into Objective-C source code.
  7. JUniversal – Java source transpiler to C# and C++ that includes a runtime library to help with portability.

iOS Certificate Wizard

I don’t know about you, but I cringe every time I need to deploy apps to iOS. There is always something with the certificates or provisioning profiles that requires tinkering. No more, I say!

This is a sneak peak of a new certificate wizard I developed for Codename One. It reduces the problem of generating certificates and provisioning profile down to a few clicks. Watch for this to be included in the Codename One plugin as soon as next week.

JavaFX WebView HTML5 API Support

javafxscore

I played with the JavaFX web view recently. The idea was to embed an HTML5 application that I had built into a plugin that we could embed inside the a Java-based IDE like NetBeans, Eclipse, or IntelliJ. The application ran fine inside the major browsers so, in theory, it should run fine inside the JavaFX web view, since it is based on WebKit. Of course, I expected a few hiccups along the way — it wouldn’t just work. Unfortunately, rather than hiccups , I hit road blocks.

My initial attempts to load the app resulted in a blank screen with no error messages reported. The first troubleshooting step, of course, was to attach error listeners to the web view. I found the API to a little bit opaque on exactly how best to log errors, but it wasn’t hard to find forum threads like this StackOverflow post that provided tips.

Unfortunately, after installing logging to just about every part of the web view, I still ended up with a blank white screen with no errors.

I was determined to get this working so I installed Firebug Lite, as described in this thread. This gave me the ability to probe the DOM at runtime more easily to see “where things were at”. I poked around for quite a while but didn’t get very far.

My next thought was that I must have been relying on some APIs that weren’t supported in the version of WebKit that shipped with JavaFX. At this point, I wasn’t even sure which Javascript engine was being used. Were they somehow using Nashorn for the Javascript Engine? Or were they using V8 or something else? It turns out that the WebView just uses the default Javascript Engine that shipped with WebKit (Javascript Core). Since the webview was proving so difficult to debug, I decided to download the same version of WebKit that was being used in JavaFX. I retrieved the version from “User Agent” string – it was 537.44.

Unfortunately, the app worked fine in that version of WebKit.

Fast forward 3 or 4 hours after banging my head against FireBug, WebKit and JavaFX, I decided to see exactly which APIs were supported in the WebView to see if something was missing.

I don’t know why I didn’t try this at the beginning. Next time I will do this at the beginning.

This information isn’t published anywhere that I could find so I loaded up html5test.com – one of those web sites that tells you information about your browser. And the result was this.

Check out that link if you want to see exactly which APIs are supported. Some highlights:

  • Score: 318 out 555
  • No file or file system APIs.
  • No IndexedDB or WebSQL.
  • No WebGL
  • No request.getAnimationFrame

I still don’t exactly know what the problem was with my app. It is a pretty complex app that uses a lot of APIs. Likely it was making a callback that never returns… or something like that.

I ultimately opted for a different solution that still met the requirements.

The nice thing about Javascript is that it is so dynamic, so missing APIs can be overcome with polyfills. JavaFX’s ability to talk back and forth between Java and Javascript offers even more flexibility. Perhaps, if I get the time and motivation, I’ll start a project for implementing polyfills for the JavaFX web view to bring in some of these missing APIs.

My WWDC 2015 “Hey that’s cool!” list

The 2015 WWDC keynote included a lot of “meh”, but a few “hey that’s cool”s. Here is my “hey that’s cool” list.

1. Search API

Apple announced a new search API that iOS app developers can use to allow users to search within their application from.

We now have an API for search. So now when a user performs a search, we can find content behind the apps they have installed on the device, and pull those up in results. And when they tap, they’re deep linked directly into the application. We even provide a convenient back link so they can get right back to their search results. We think these kinds of intelligence features really make a huge difference in your experience in iOS.

Android has provided a similar API for a while now, so this feature is really just playing a little catch-up. But what this means for Codename One is that it will now be possible to design a cross-platform API for this.

2. Swift Open Source

When Swift was first announced (and not open sourced), many pundits were cynical of Apple’s motives – particularly suspecting that Apple was looking to create yet another “lock-in” mechanism for developers. While this is still probably true, their decision to open source it at least some good faith. Their announcement from the Swift blog

Here is what we can tell you so far: 1. Swift source code will be released under an OSI-approved permissive license. 2. Contributions from the community will be accepted — and encouraged. 3. At launch we intend to contribute ports for OS X, iOS, and Linux. 4. Source code will include the Swift compiler and standard library.

We think it would be amazing for Swift to be on all your favorite platforms.

With Swift’s apparent success, one must wonder how long Objective-C will remain “supported”. Apple historically has had no qualms about pulling the rug out from developers when they want to make a shift, and Objective-C certainly is showing its age – so don’t be surprised if, some time in the next couple of years – we get a new WWDC bombshell that Objective-C is being scrapped.

Codename One currently compiles everything down to plain old C code so we would be largely unaffected by such a change – although there would be some native portions that use Objective-C that would need updating. Luckily, if you’re a Codename One user, you don’t need to concern yourself with these details because you are working in Java.

3. iPad Split Screen

This is the coolest advance of them all. Being able to have two apps open at once makes the iPad much more functional – one step closer to replacing the laptop for a lot of users. As a power user, I have often felt that the iPad is not living up to its potential as a computing device – and usually ends up working like just a large iPhone. Small advances like split screen open the doors for app developers to make innovative apps that empower the user to do things that weren’t previously possible.

One small bit of irony is that many apps that were developed using Apple’s development toolkit will need have modifications made to support the different sizing that would occur when an app is displayed in split screen. Codename One apps should “just work”, since it is designed from the ground up, with layout managers, to work across many different devices and screen dimensions.

4. Metal

Metal was announced last year as a more efficient graphics layer than OpenGL for iOS. Now it is available on Mac OS X. Apple describes Metal thusly:

Metal provides the lowest-overhead access to the GPU, enabling you to maximize the graphics and compute potential of your apps on iOS and OS X. With a streamlined API, precompiled shaders, and support for efficient multi-threading, Metal can take your game or app to the next level of performance and capability.

In the key note they cited performance improvements by switching to Metal between 30% and 700%. Codename One is currently using OpenGL for all of our graphics rendering but we have had our eye on Metal for some time. It is uncertain how much we can stand to gain by a switch to Metal. My conservative estimate would be closer to 30% than 700% – but who knows.

5. Apple Pay

Apparently Apple Pay is catching on. In the keynote they dazzle us with lots of numbers (e.g. 250 banks have signed on, etc…) that make it look like they really have a chance of taking over. They have successfully chiseled out a large chunk of the music and software pie. If they can get a piece of every retail transaction … I shudder to think of how big they could become. Welcome our new overlords.

Writing Synchronous Wrappers for Asynchronous Methods in TeaVM

In my last post, I shared a little bit about the work I’ve been doing porting Codename One into Javascript using TeaVM. In that post I mentioned that TeaVM supports multithreading in the browser. In my opinion, this is a major advancement as it finally allows us to write code synchronously in the browser. I.e. NO MORE CALLBACK HELL!

This is great, however, all of the existing Javascript APIs work asynchronously so if we want to work with them synchronously, we need to write synchronous wrappers for them. I expect that, over time, we’ll develop a standard library of such wrappers, but for now, we may need to do some wrapping on our own.

Example: Synchronous Wrapper for XHR Requests

The following method wraps XMLHTTPRequest to allow us to load the contents of a URL as a byte array. A similar mechanism could be used to fetch the contents as text, or a blob.

public Uint8Array getArrayBuffer(String url){
    Window window = (Window)JS.getGlobal();
    final XMLHttpRequest req = window.createXMLHttpRequest();
    final Object lock = new Object();
    final boolean[] complete = new boolean[1];
    req.open("get", url, true);
    req.setOnReadyStateChange(new ReadyStateChangeHandler() {

        @Override
        public void stateChanged() {
            if ( req.getReadyState() == XMLHttpRequest.DONE ){

                new Thread() {
                    @Override
                    public void run() {
                        complete[0]=true;
                        synchronized(lock){
                            lock.notifyAll();
                        }
                    }
                }.start();
            }
        }
    });
    req.setResponseType("arraybuffer");
    req.send();

    while (!complete[0]){
        synchronized(lock){
            try {
                lock.wait();
            } catch (InterruptedException ex) {
                Logger.getLogger(getClass().getName()).log(Level.SEVERE, null, ex);
            }
        }
    }

    if (req.getResponse() == null  ){
        System.out.println(req.getAllResponseHeaders());
        System.out.println(req.getStatusText());
        System.out.println("Failed to load resource "+url);
        System.out.println("Status code was "+req.getStatus());
        return null;
    }

    return window.createUint8Array(
            (ArrayBuffer)req.getResponse()), req.getResponseType());

}

See a neater version of this code as a Gist

A couple of things to notice:

  1. Inside stateChanged(), we spawn a new Thread because threading primitives like synchronized and notifyAll() won’t work directly running in a native Javascript callback (at the time of this writing).
  2. The loop with lock.wait() doesn’t block the main Javascript thread. It uses callbacks in the background to pause execution of this “thread” until the lock.notifyAll() method is called.

Now we can use this method directly in our Java code to load data from a remote server synchronously without blocking the UI thread, and without introducing callback hell into our code.